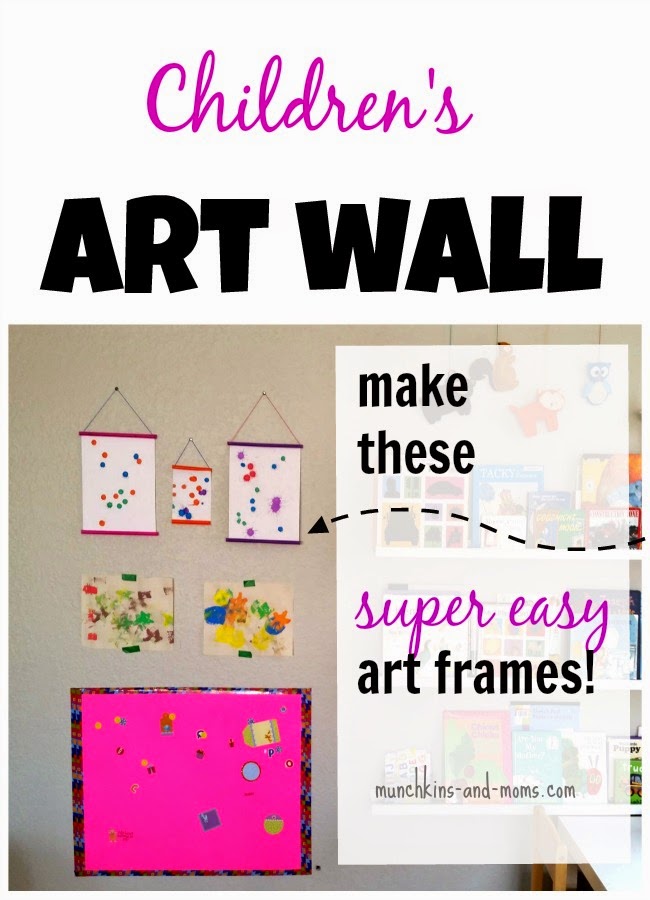
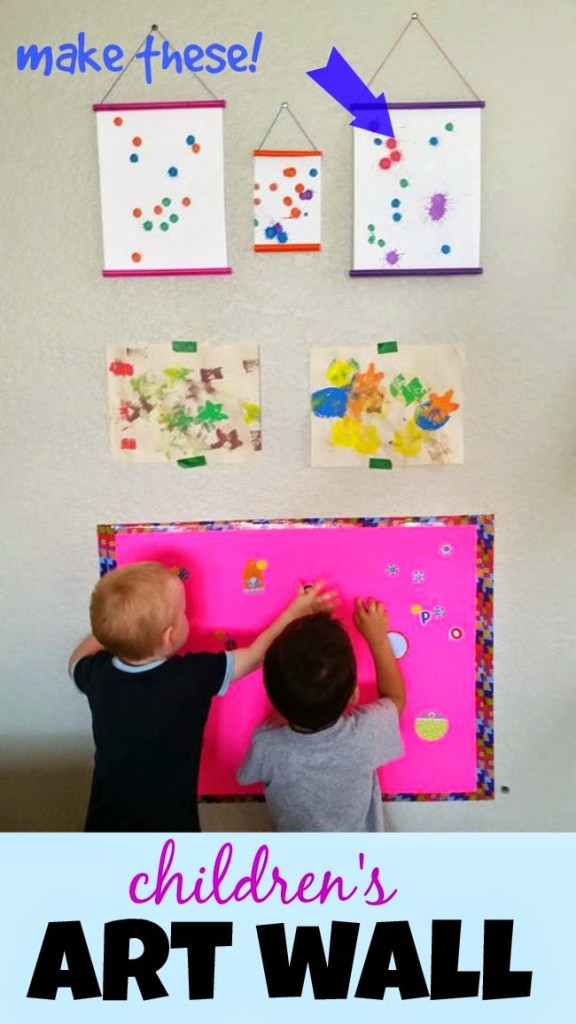
Hi all! Remember last week in my Untoy: Playing and Crafting with straws post, I mentioned that I had a special project I was working on? Well, I’m finally ready to show it off: My children’s Art Wall with DIY frames!

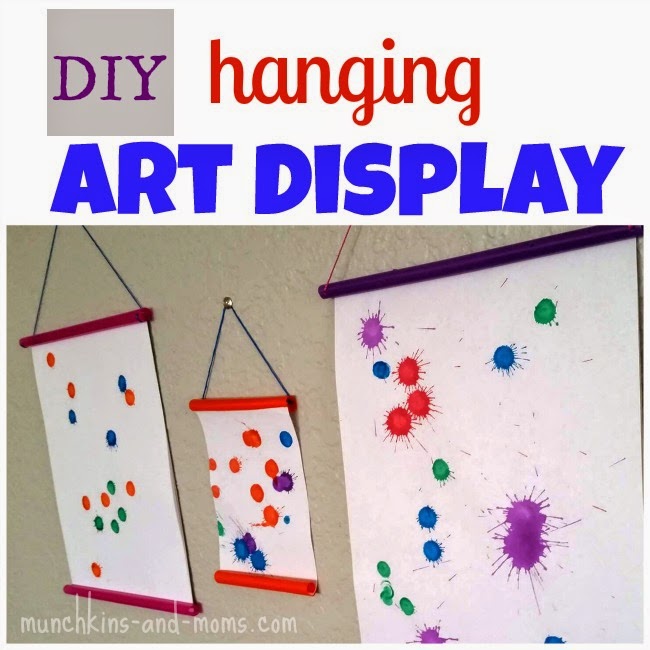
I wish I could say that I made up this craft all by myself, but I didn’t. I was inspired by this lovely paper straw picture frame post. I just adapted it to fit my needs (I used extra large plastic straws versus those super cute paper straws).
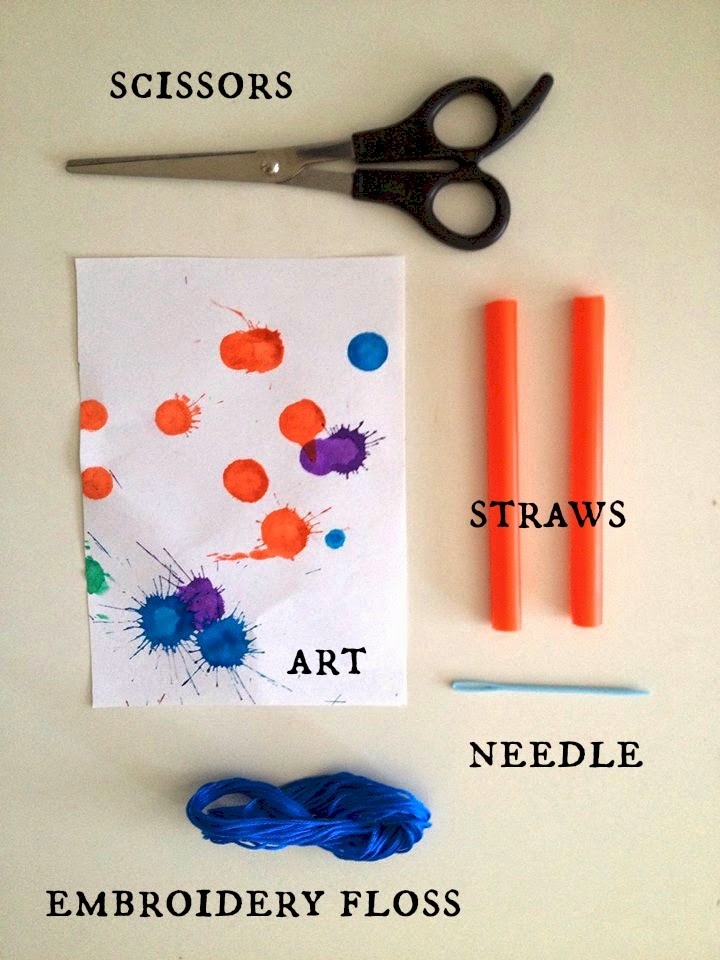
Materials:
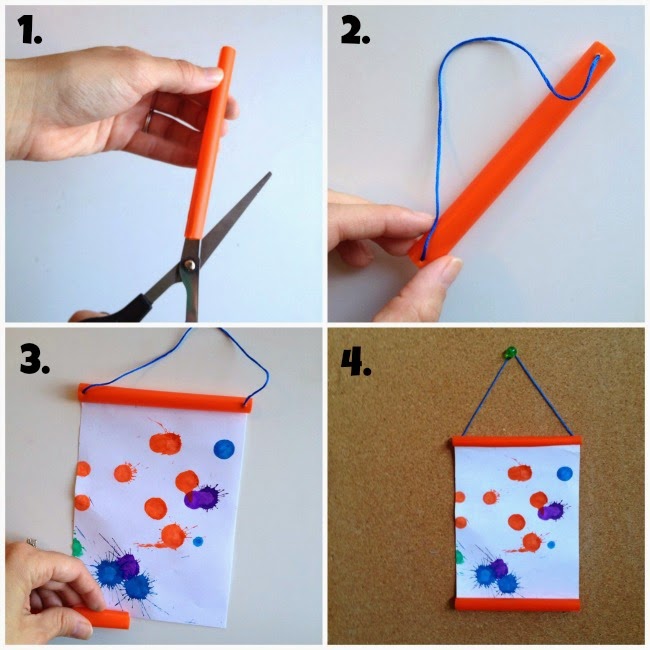
Directions:
-
Cut a slit all the way through each straw. (I recommend using the slimmest pair of scissors you have. Larger scissors will be more difficult to slide through the straw.)
-
Thread the embroidery floss through the needle and poke two holes through one of the straws. Secure the floss with a knot.
-
Slide the art through each slit of the straws. (If the paper is too thin, you may need to back it with cardstock to make this step easier.)
-
Display!
I LOVE how fun and colorful these frames look in our reading corner!
We also added a sticker board (from No Time for Flashcard’s sticker station idea)
And do you see we are still displaying our Potato Art Prints?
I don’t think the pictures are doing these art frames enough justice (I need a better camera!) You really need to make them to see just how great they are 🙂
How do you display your kids’ artwork? I’d love to hear your ideas below!