{For your convenience, this post may contain affiliate links}
Yesterday was Papa’s birthday, and we had a lot of plans. We wanted to arrange a small party, give him gifts, and pamper him the most. For instance, we thought that we would gift him a candy bar that had a photo of him and “We love You” written on the wrapper (those interested to buy Custom Candy Bar Wrappers can visit the websites of online shops like Announce It!). However, we could not really arrange for a lot of things as we were short on time so much so that we could not even go out to buy a card for him. Anyway, it is always a good idea to gift a handmade card instead of going out and buying a $28 birthday card (doesn’t it seem like that’s what they cost nowadays?!). So, we decided to do a DIY version.
Many feel that they’re not cut out for DIY and avoid it all costs, but with so many supplies made available, like these printable svg cut files designs, it’s much easier than wasting your money on what could be a worse quality card! I super love how it came out, so we made a few more to share on the blog today (it’s always nice to have extra cards handy for last minute parties, anyways) 🙂
Supplies:
-
Paper
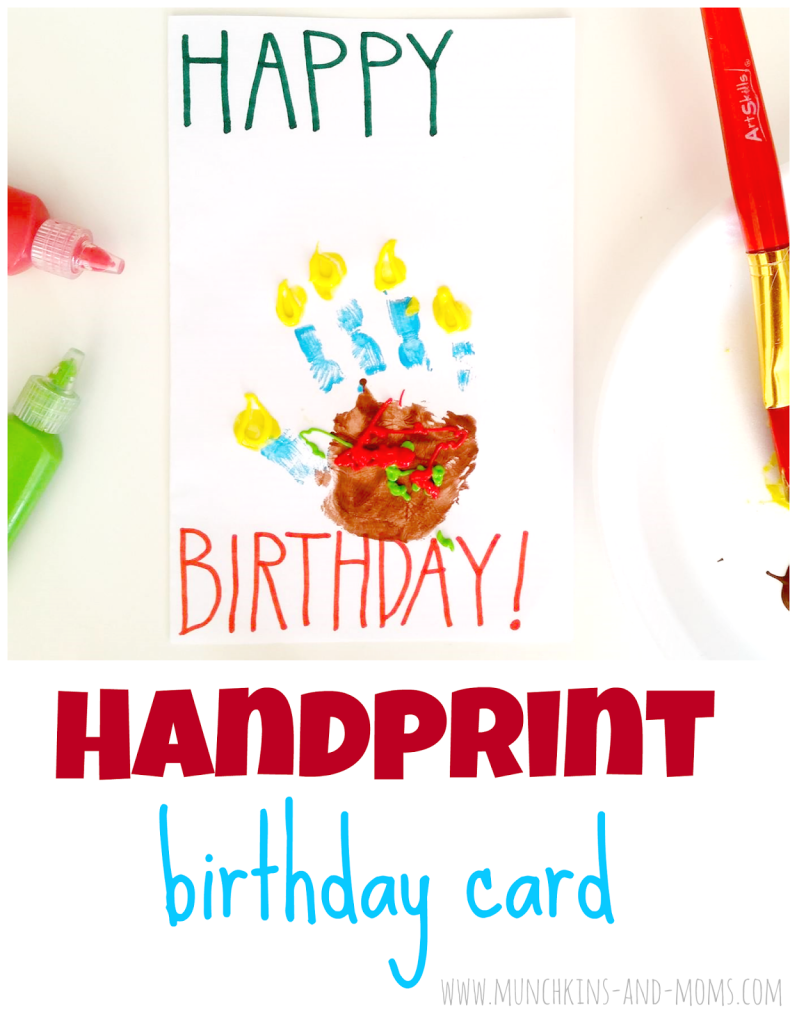
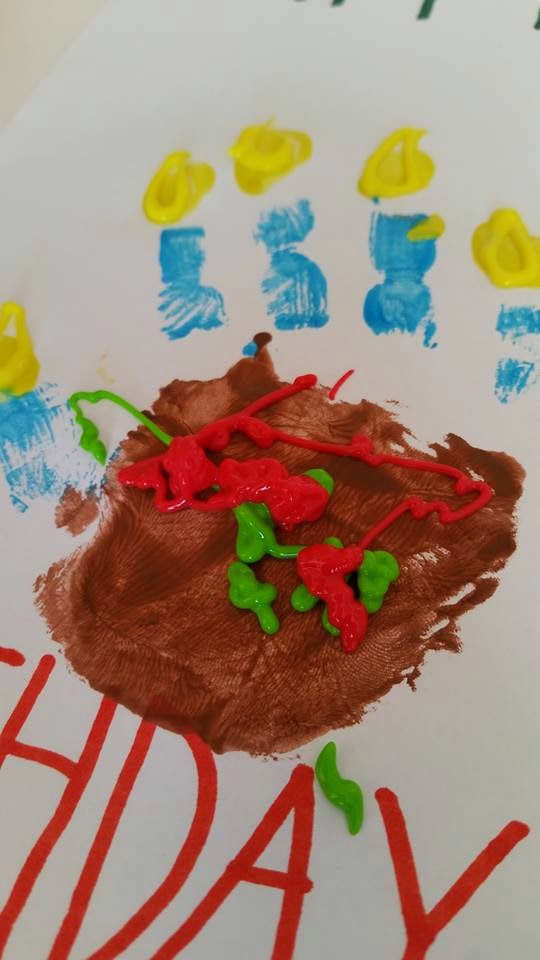
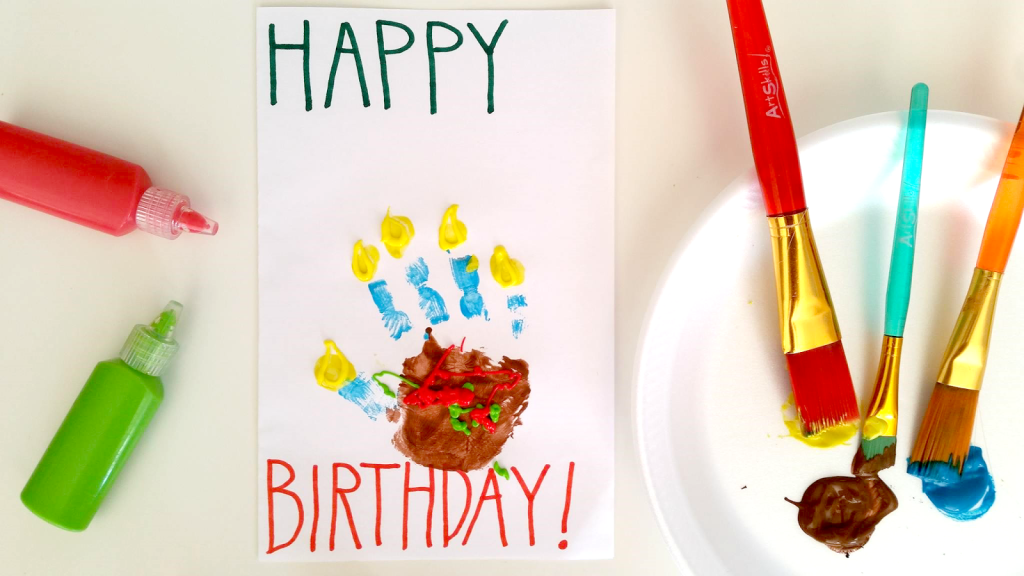
I don’t know if you can tell, but I was going for the handprint to look like a piece of cake (tell me you see it please…) 😉 To get that affect, I painted the palm of my son’s hand brown (for chocolate cake), his fingers blue (for the candles), and his fingertips yellow (for the flames).
**TIP** Make sure to write the birthday message prior to stamping your munchkin’s handprint. The paint may take a while to dry and I wouldn’t want you to smudge the beautiful artwork!
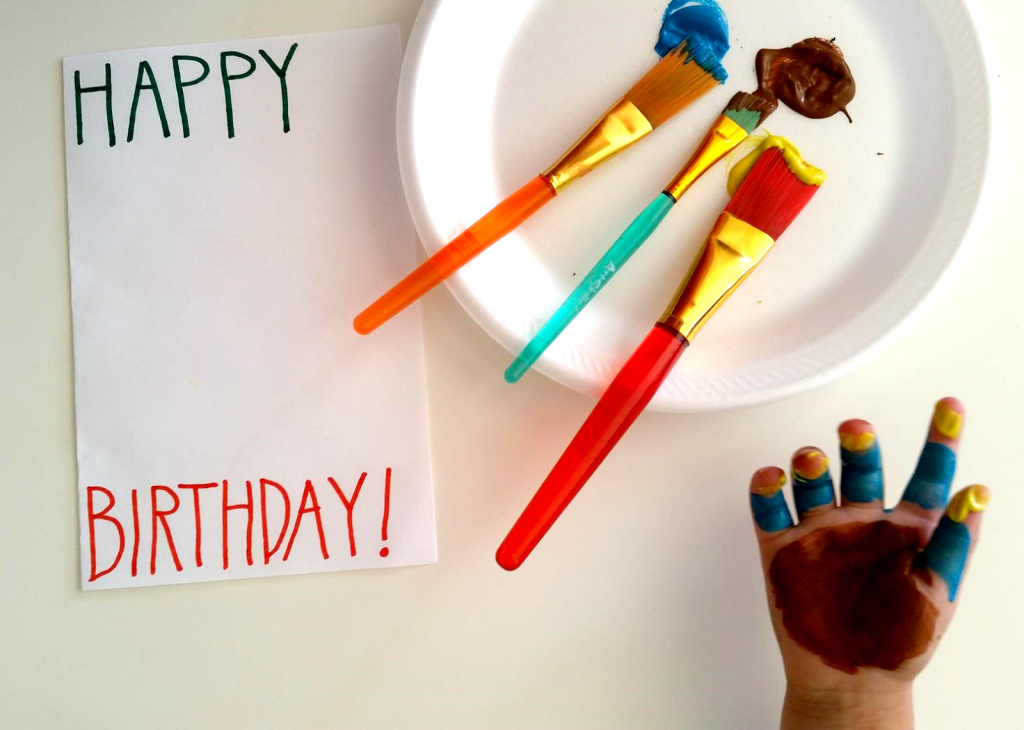
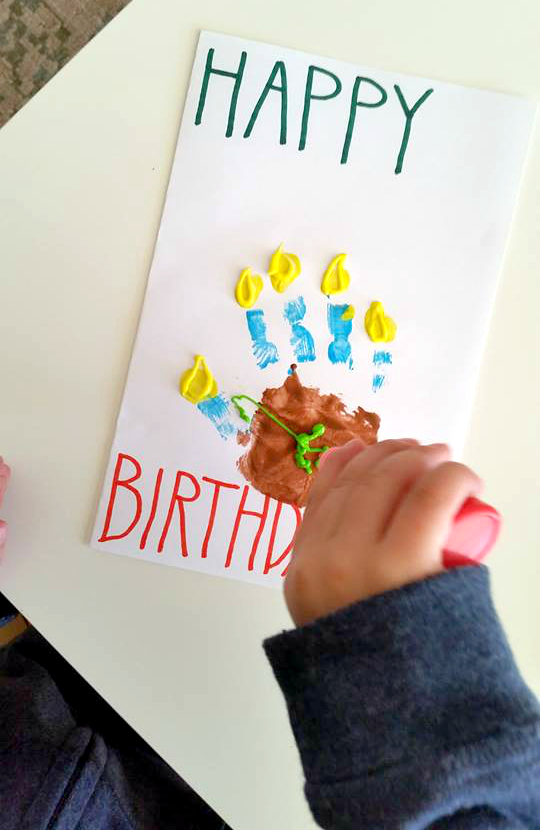
Now depending on how much fine motor control your tot has, you may need to do the next part solo. I chose to do this myself since my little man doesn’t have the control needed to carefully outline flame shapes on the fingertips. Plus, I kind of enjoyed the chance to use puffy paints- takes me back to my childhood!
My son wasn’t completely left out of the puffy paint fun though, he had a chance to use them to make the “sprinkles” (well, they were supposed to be sprinkles, but it came out more like frosting! Still cute though:-)
Look at that texture! That’s why puffy paints will always be a craft room staple for me :-)?
The thicker the puffy paints are applied, the longer this card will take to dry, so it’s probably not something you want to put off making until the last minute (or you may be holding the card up to a full blast air conditioning vent in the car while on your way to the party…I know from experience).
?
Did you enjoy this project? Make sure you follow Munchkins and Moms on Pinterest for more great ideas everyday!
?